|
This will take you through the process of using CocoGnut for the first time. It will show you how to connect to the
network, search for a file and download it.
1. Connect to the Internet
|
 Before running CocoGnut, you must ensure that you are connected to the Internet. If other applications, such as
your web browser or e-mail software are working, CocoGnut will too.
Before running CocoGnut, you must ensure that you are connected to the Internet. If other applications, such as
your web browser or e-mail software are working, CocoGnut will too.
|
2. Merge your !System
|
 CocoGnut requires the CryptRand (0.12) module in order to work. It also requires MimeMap, but you should already have this if you have a working Internet connection. Merging !System installs CryptRand for you.
Merging can be done by double clicking on !Boot in your hard drive's main directory and clicking on 'System'. Then, drag the !System, provided with CocoGnut, into the System merge window. Click Merge and CryptRand will be installed.
|
3. Double click on !CocoGnut
|
 If CocoGnut is run for the first time, it will ask you to check the configuration and save it. For most users, the
default settings should be acceptable, so save the text file that opens up.
If CocoGnut is run for the first time, it will ask you to check the configuration and save it. For most users, the
default settings should be acceptable, so save the text file that opens up.
|
4. Double click on !CocoGnut, again!
|
CocoGnut will now appear on the icon bar. It will also perform some preliminary queries to gather connections
for the Gnutella network and will attempt to connect to it.
|
5. Click on the icon bar icon
|
This will open up the main CocoGnut window and you will be able to see what it is doing. CocoGnut will attempt
to connect to the network and you can see its progress.
|
6. Wait for stable connections
|
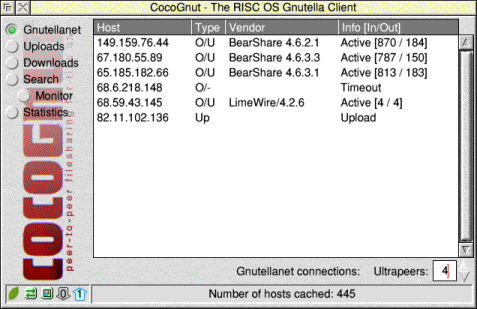
It may take some minutes for CocoGnut to obtain reliable connections to the Gnutella network, so it is best
to wait until the green leaf icon in the bottom-left stops flashing and remains green as shown in the image
above.
|
7. Perform a search
|
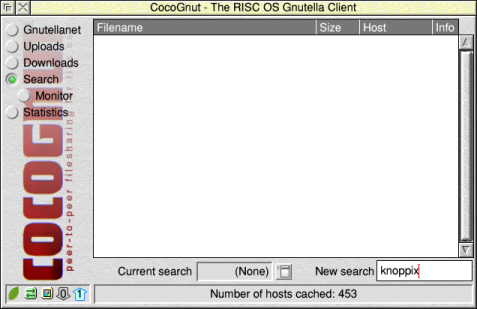
By clicking on the 'Search' button, you will open up the search window. From here, you can enter
some text in the writable icon and press RETURN to start the search. It is often best to add the type of file
you are looking for to the search text, eg. if you are looking for an MP3 file by Memories of Tomorrow, you could type
'memories tomorrow mp3'. In this case, we're looking for any Knoppix
files, so we type in 'knoppix'
|
8. Wait for results
|
It may take a few minutes for search results to be returned, depending on the popularity of the
file you are looking for. If no search results are found, letting CocoGnut continue to run will cause it
to resend your search through all the new connections it makes; you may have more luck finding your file
if CocoGnut is left running for a long time.
|
9. Start a download
|
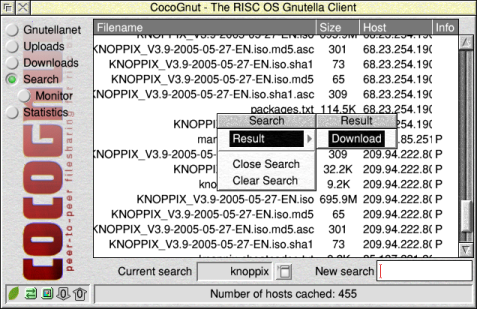
When you get some search results, press the menu mouse button over the result you wish to download,
move over to the 'Result' submenu and click on 'Download'.
Note that you will have the most chance of successfully downloading a file if there is no text under the
'Info' column. A 'P' means that the person sharing the file is firewalled and a
'B' means that they are presently busy sending files to other users. If you cannot see the
entire filename, use an interactive help application such as !Help.
|
10. Wait for your download to finish
|
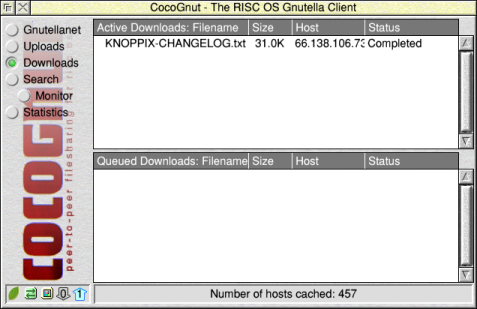
If CocoGnut has been successful in starting a download, you will see an entry in the main Download window.
However, if a connection has failed, it will be placed in the queue with a reason for failure. CocoGnut will
retry all downloads in the queue after a short delay. When your download has reached 100%, its status will
change to 'Completed' and the download will be complete.
|
11. See the finished results!
|

After a download is completed, CocoGnut will move the file to the 'Completed' directory which
is, by default, in the same directory !CocoGnut resides in. You are then free to do what you like with the file.
|
|